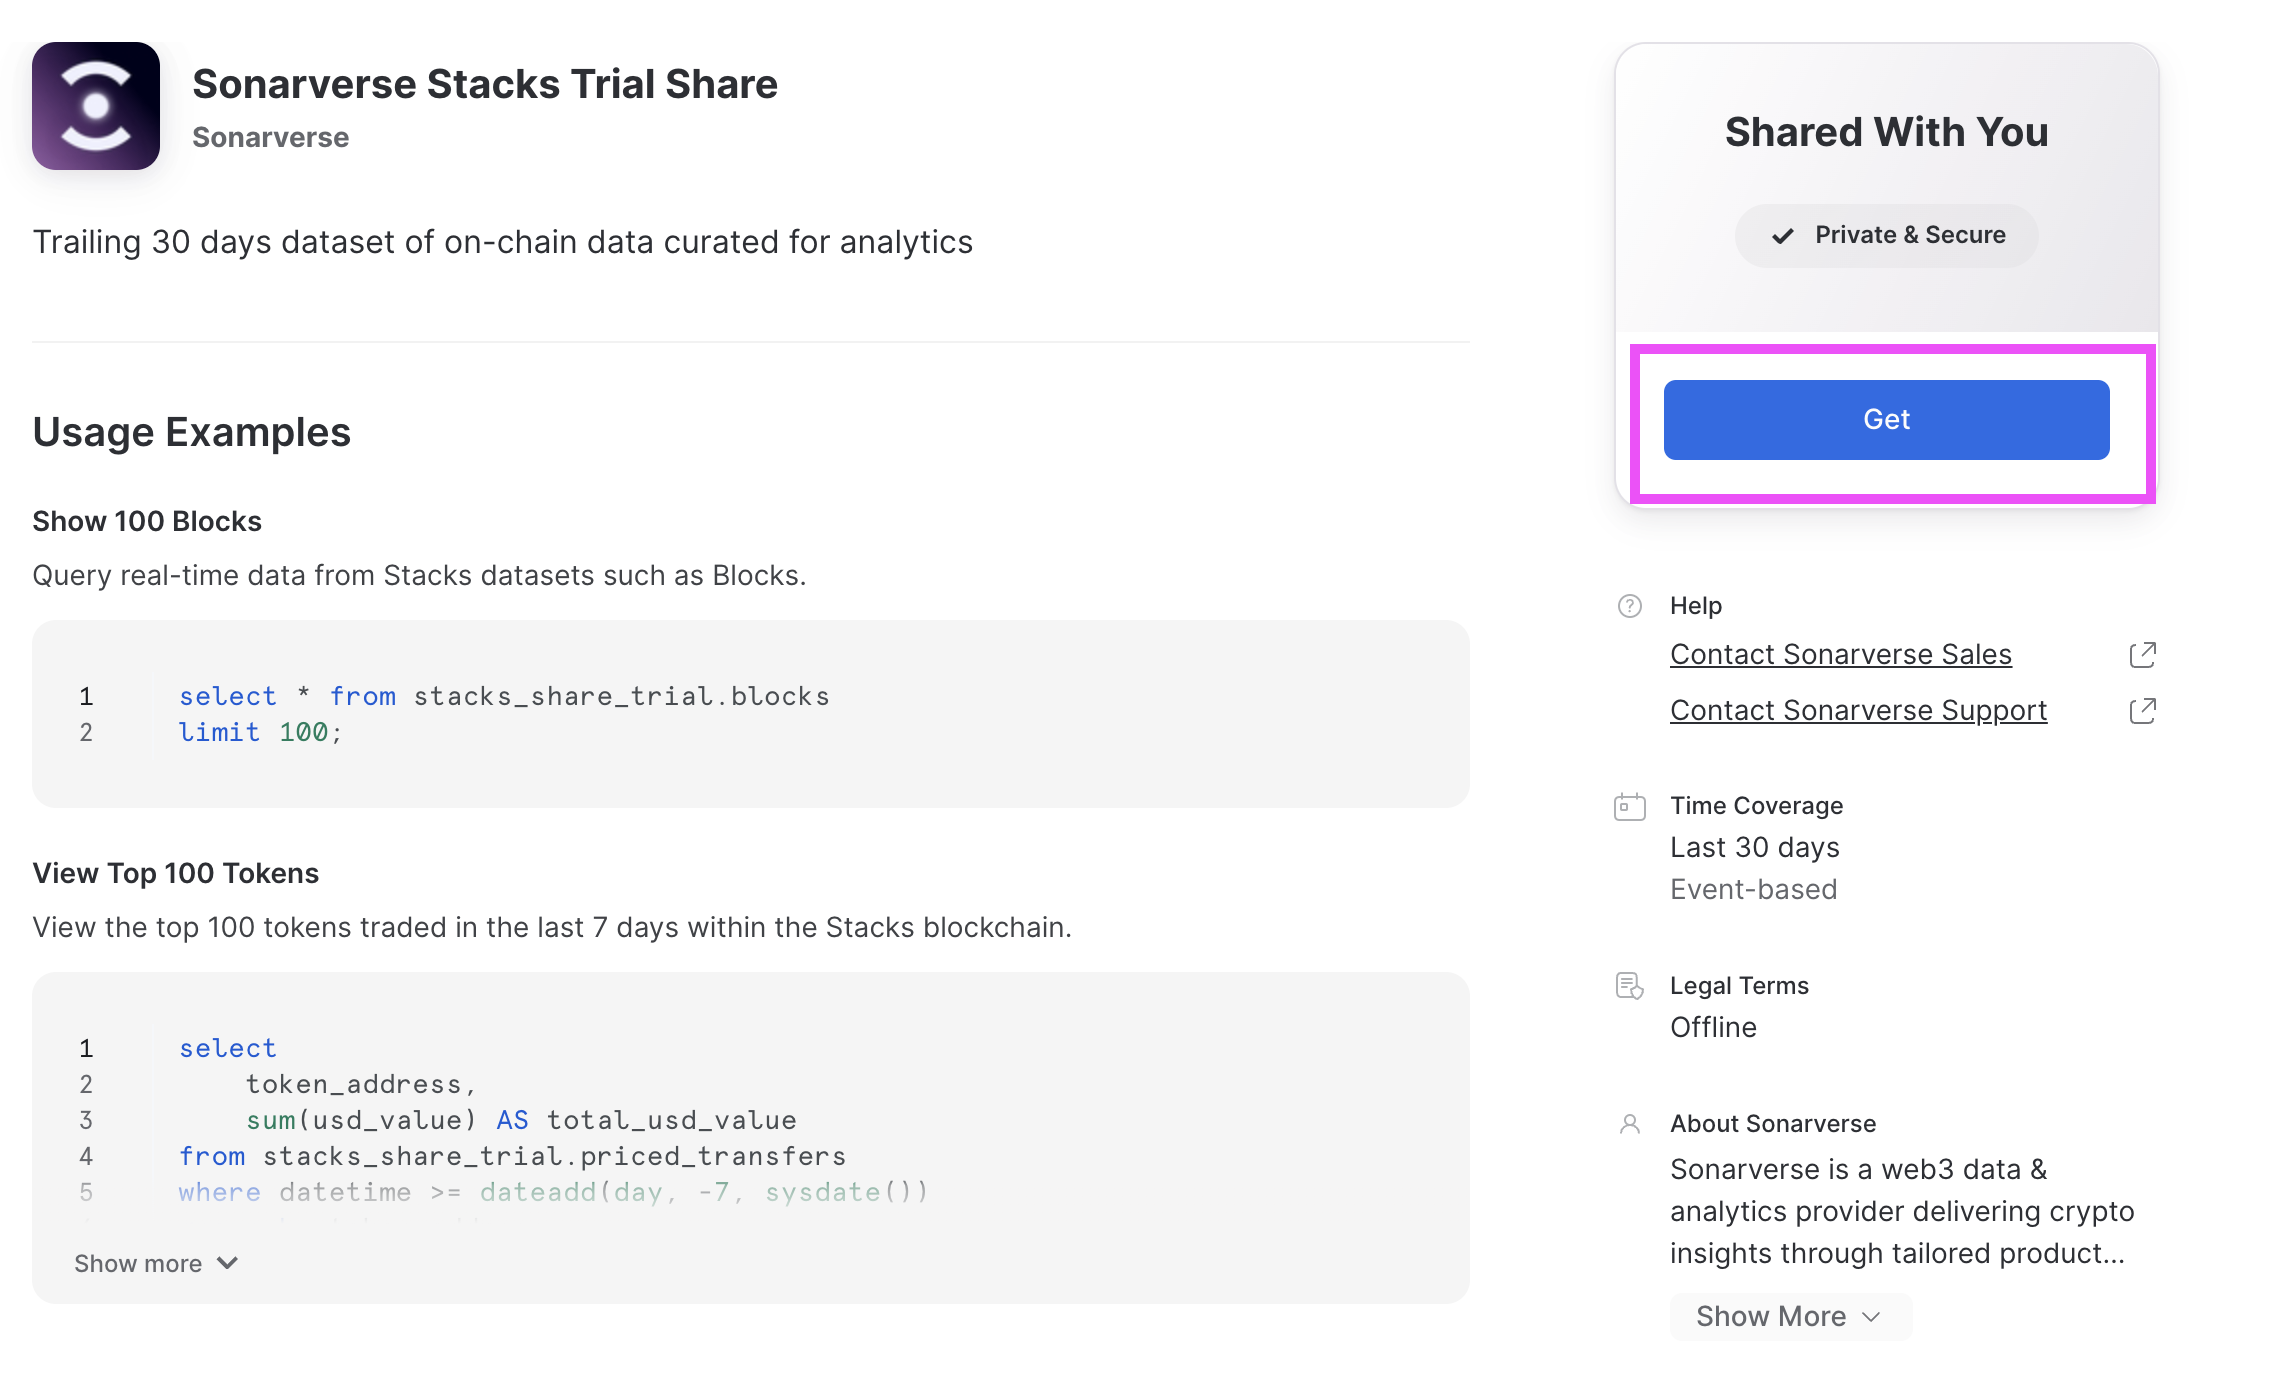
HOW TO GET STARTED WITH SNOWFLAKE
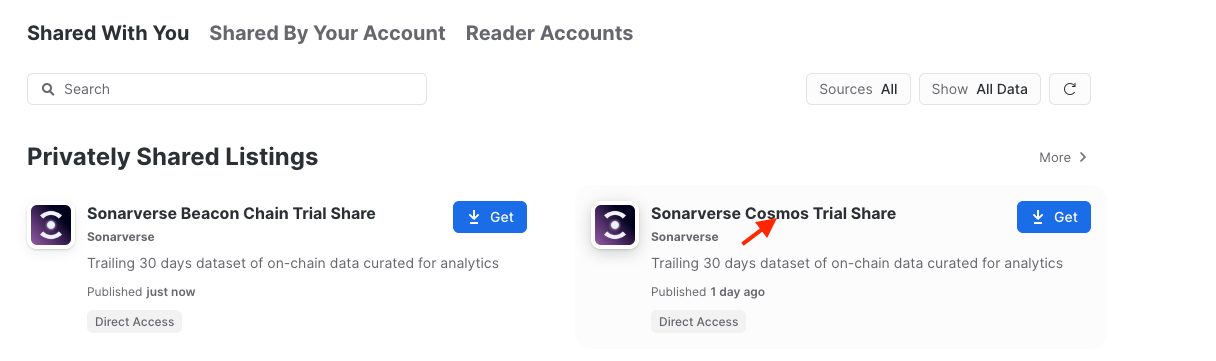
- Go to Data Products -> Private Sharing -> Shared With You
- Click on one of the shares. I will be using the “Sonarverse Stacks Trial Share” as an example.
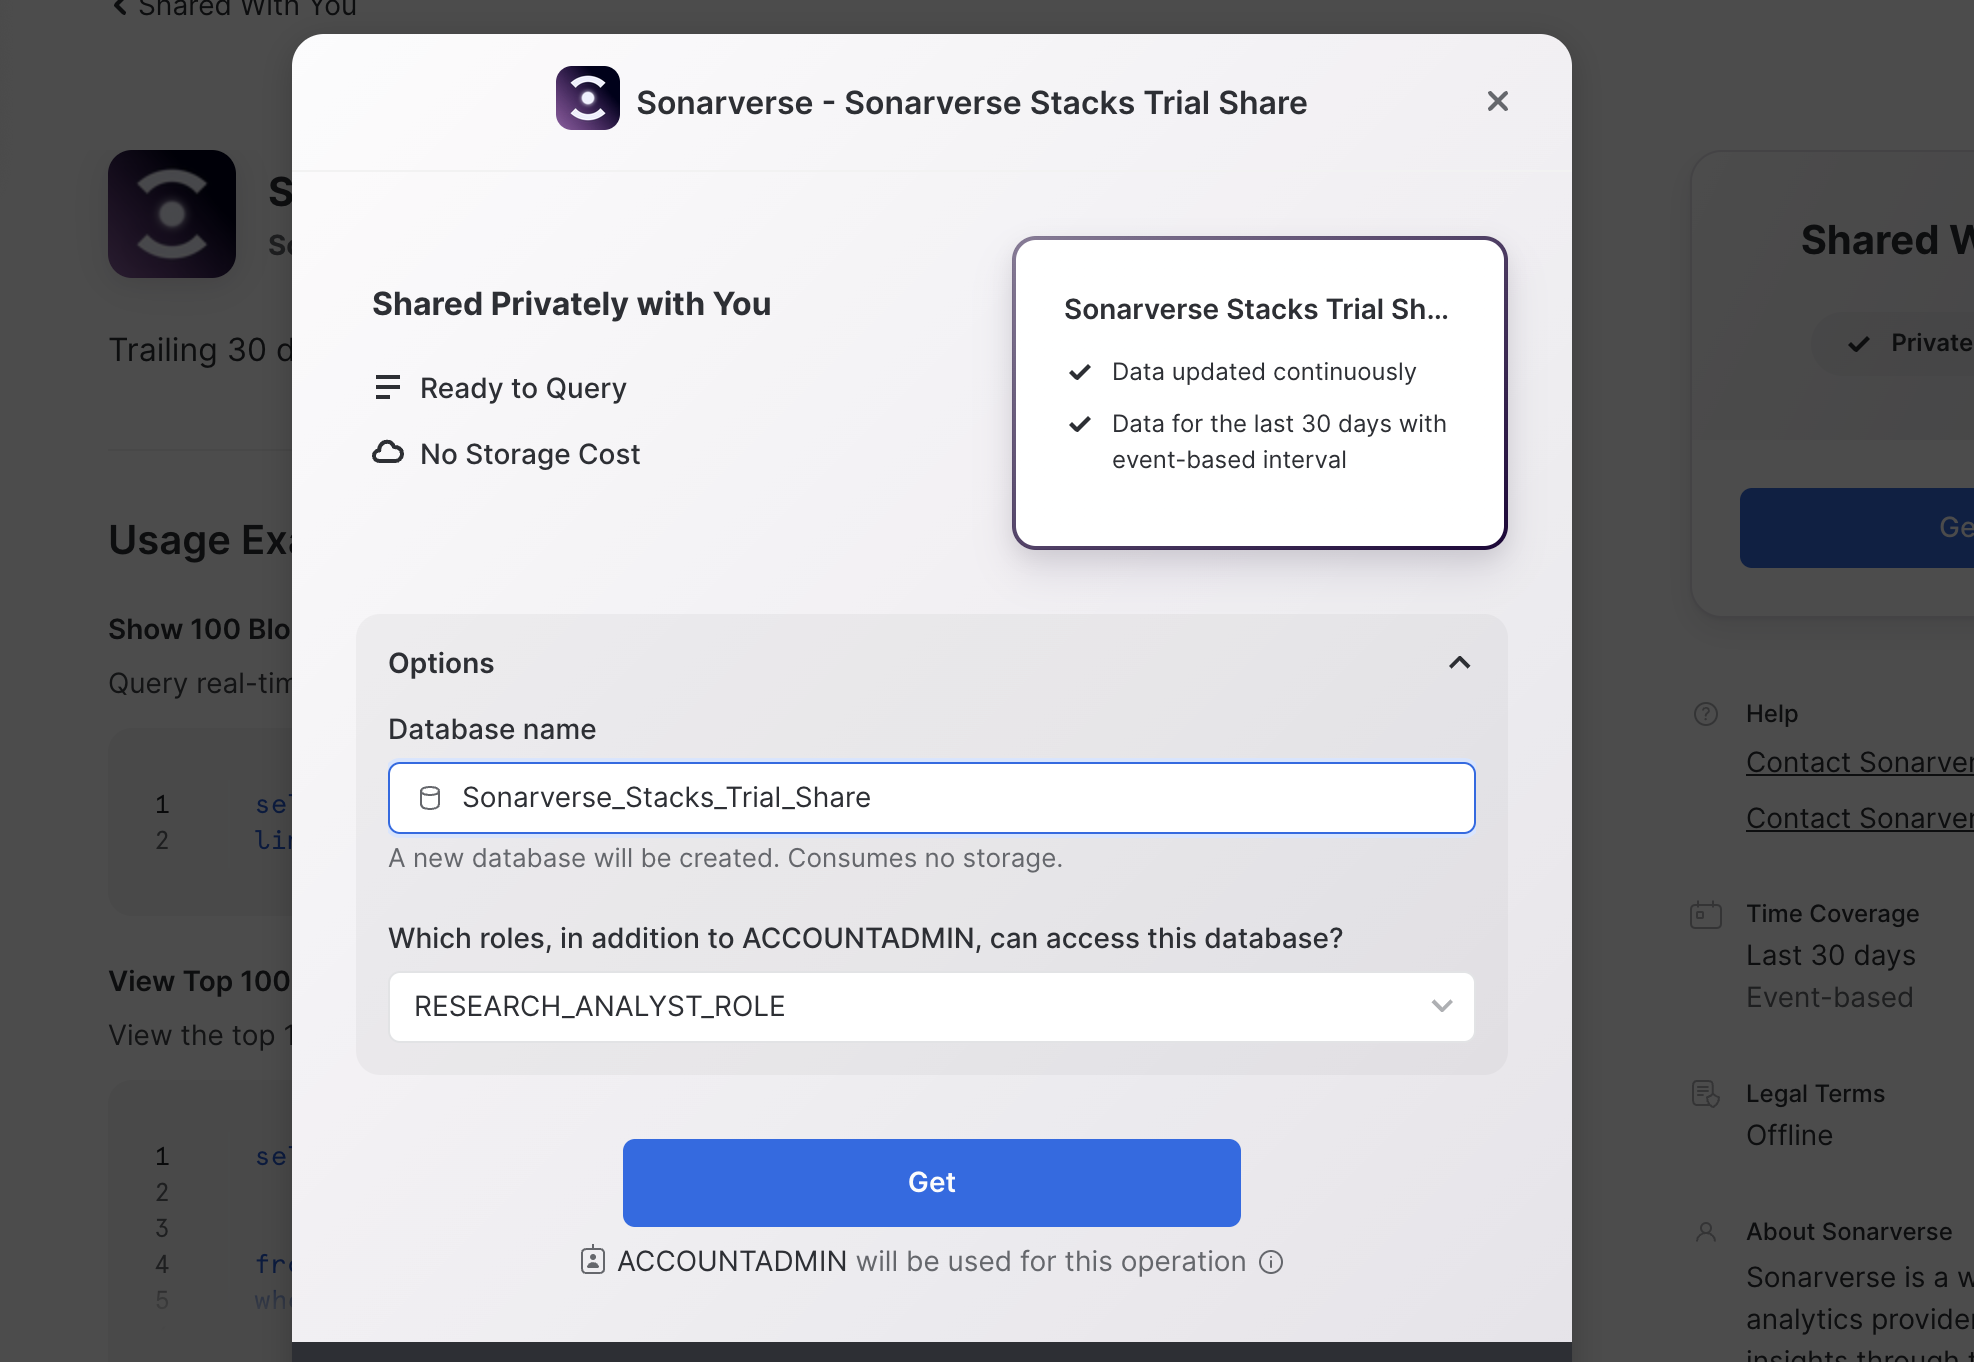
- Click “Get”
- Denote the database name and which roles can access that share. E.g. if you grant the RESEARCH_ANALYST_ROLE permission to access this database, any user with the RESEARCH_ANALYST_ROLE can access the database.
- Repeat steps 1-4 for the any other provisioned shares.
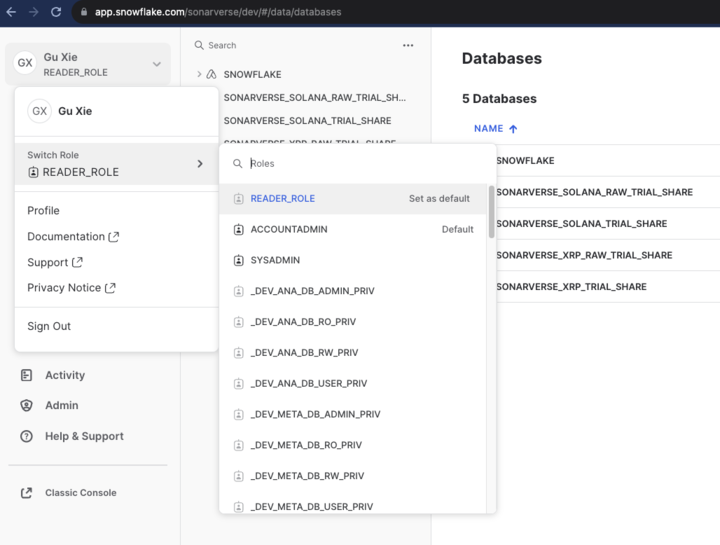
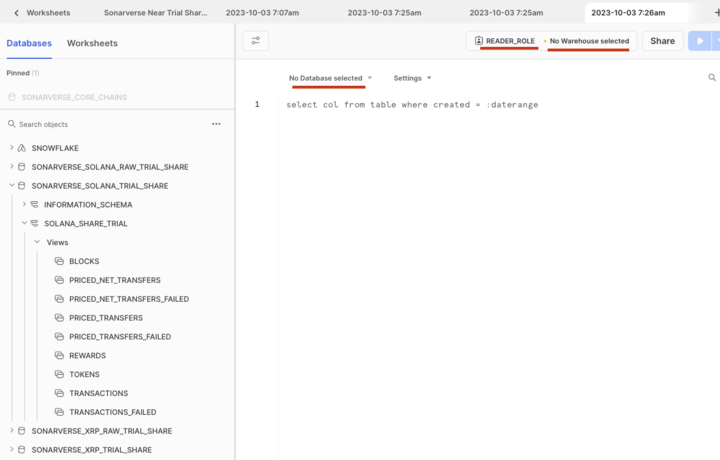
- Open a worksheet and run the query “show databases;” to view the databases that are automatically created from these shares. From there you can create your own tables from the databases.
HOW TO PROVISION A NEW USER IN SNOWFLAKE
Customers should share the same Snowflake Account. That way they can share the same infrastructure and consolidated billing, if need be. You can do so by CREATE USER command or via the UI from:- Admin -> Users & Roles

HOW TO GRANT ACCESS/PRIVILEGES FOR SNOWFLAKE USERS
Here is a series of useful scripts to help you get started on Snowflake.- Creates a READER_ROLE to access Snowflake data
- Creates a READ_WH to run compute on Snowflake
- Grants permission on READ_WH to the new READER_ROLE
- Grants IMPORTED PRIVILEGES on data shares to READER_ROLE
- Grants READER_ROLE to Users
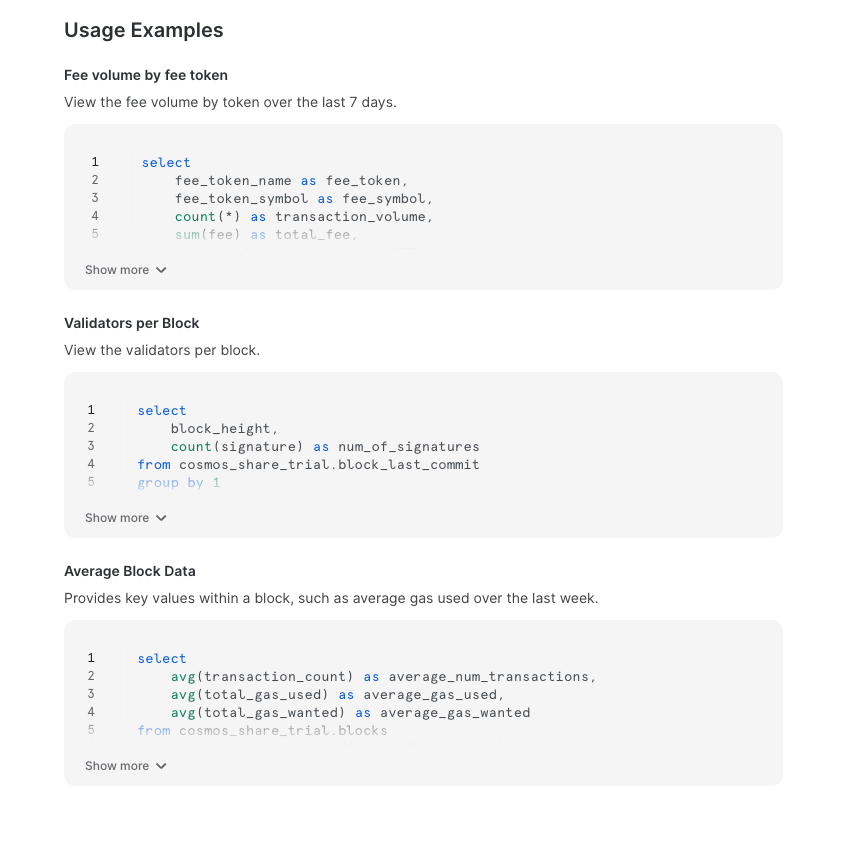
HOW TO VIEW DATA DICTIONARY AND SAMPLE QUERIES IN SNOWFLAKE
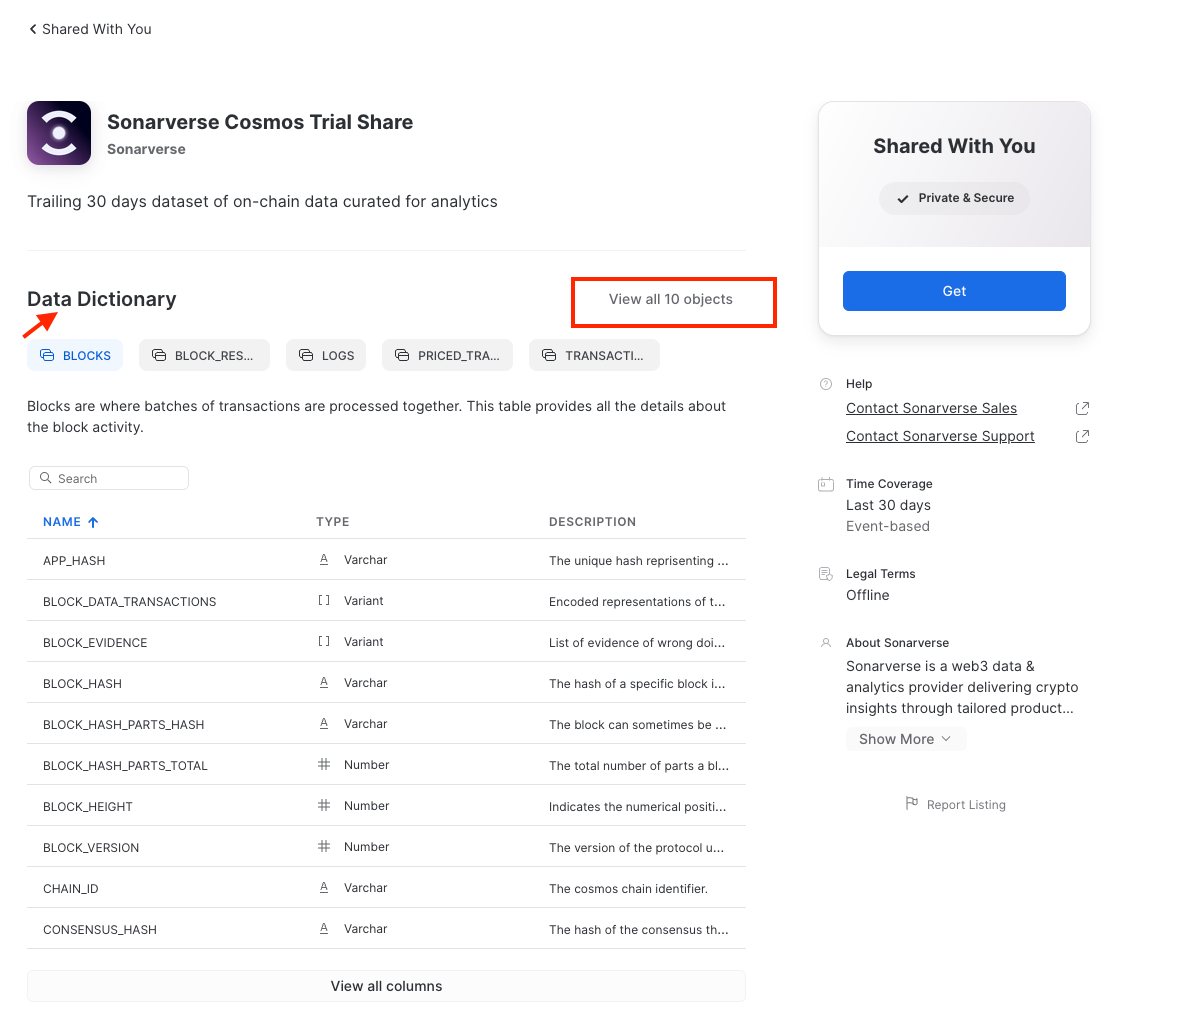
Please note the following steps to view the Data Dictionary of a Data Share:- Go to Snowflake -> Private Sharing -> Shared With You
- Click on the listing (using Sonarverse Cosmos Trial Share as an example)
- You will be able to view the Data Dictionary of that share, where you can see all the table and column definitions directly in Snowflake.
- Scroll further down to see sample queries